Hello I'm back with something different today! I'm on a roll, seriously I can't stop making things. I have been so inspired lately and things are starting to get more organized around here after moving. I hope this fun project inspires you too.
So today I'd like to share with you and fun project for your kids. I created this interactive play mat using the digital set "Wild Things" from Beth Duff Designs. I've got to tell you though this set is Retiring on June 16 so now is your last chance to get it. So grab it while you can!
Click here to get a coupon for 10% off, when you get to the website look for the pink button that says Reward Program and sign up your e-mail to receive your coupon.
I started off by separating the scene image from the animal section of the digital image on the computer. Then I printed the scene and animals on separate pieces of paper so I could print them full size.
Here is the sneak peak of the coloring and the project to come.


My Son Riley loved playing with this, and he was making the animal noises as he played. I'm sure we will get a lot of use out of this and we might just need to make a few extras for some friends.
I hope this inspired you today and gave you a new way to use and play with digital stamps.
Affiliate Link Disclosure: I participate in various affiliate programs. That means I receive a small commission, at no additional cost to you, when my readers purchase products through links I provide here on my blog. By participating in affiliate programs I am able to generate income by sharing links to the products I love. I only share product info for things I love and use in my projects. If I don't love it I won't endorse it here. I'm a proud affiliate of Scrapbook.com, and Simon says stamp.

So today I'd like to share with you and fun project for your kids. I created this interactive play mat using the digital set "Wild Things" from Beth Duff Designs. I've got to tell you though this set is Retiring on June 16 so now is your last chance to get it. So grab it while you can!
Click here to get a coupon for 10% off, when you get to the website look for the pink button that says Reward Program and sign up your e-mail to receive your coupon.
I started off by separating the scene image from the animal section of the digital image on the computer. Then I printed the scene and animals on separate pieces of paper so I could print them full size.
Here is the sneak peak of the coloring and the project to come.
I colored all the images using spectrum noir markers. I used DG3, CG1, DG2, TB2, IG6, IG4, True Black, EB2, CT4, OR1, TN8, Blender, PP5, EB8.
After I colored the images I cut out the "It's a Jungle out there" sentiment and colored that too. Then I adhered that using my X Xyron Sticker maker. I also added another piece of white card stock to the back of the scene page to hide any of the bleed through from the markers and make it a bit more sturdy. After that I ran the scene and animals through my Scotch laminator.
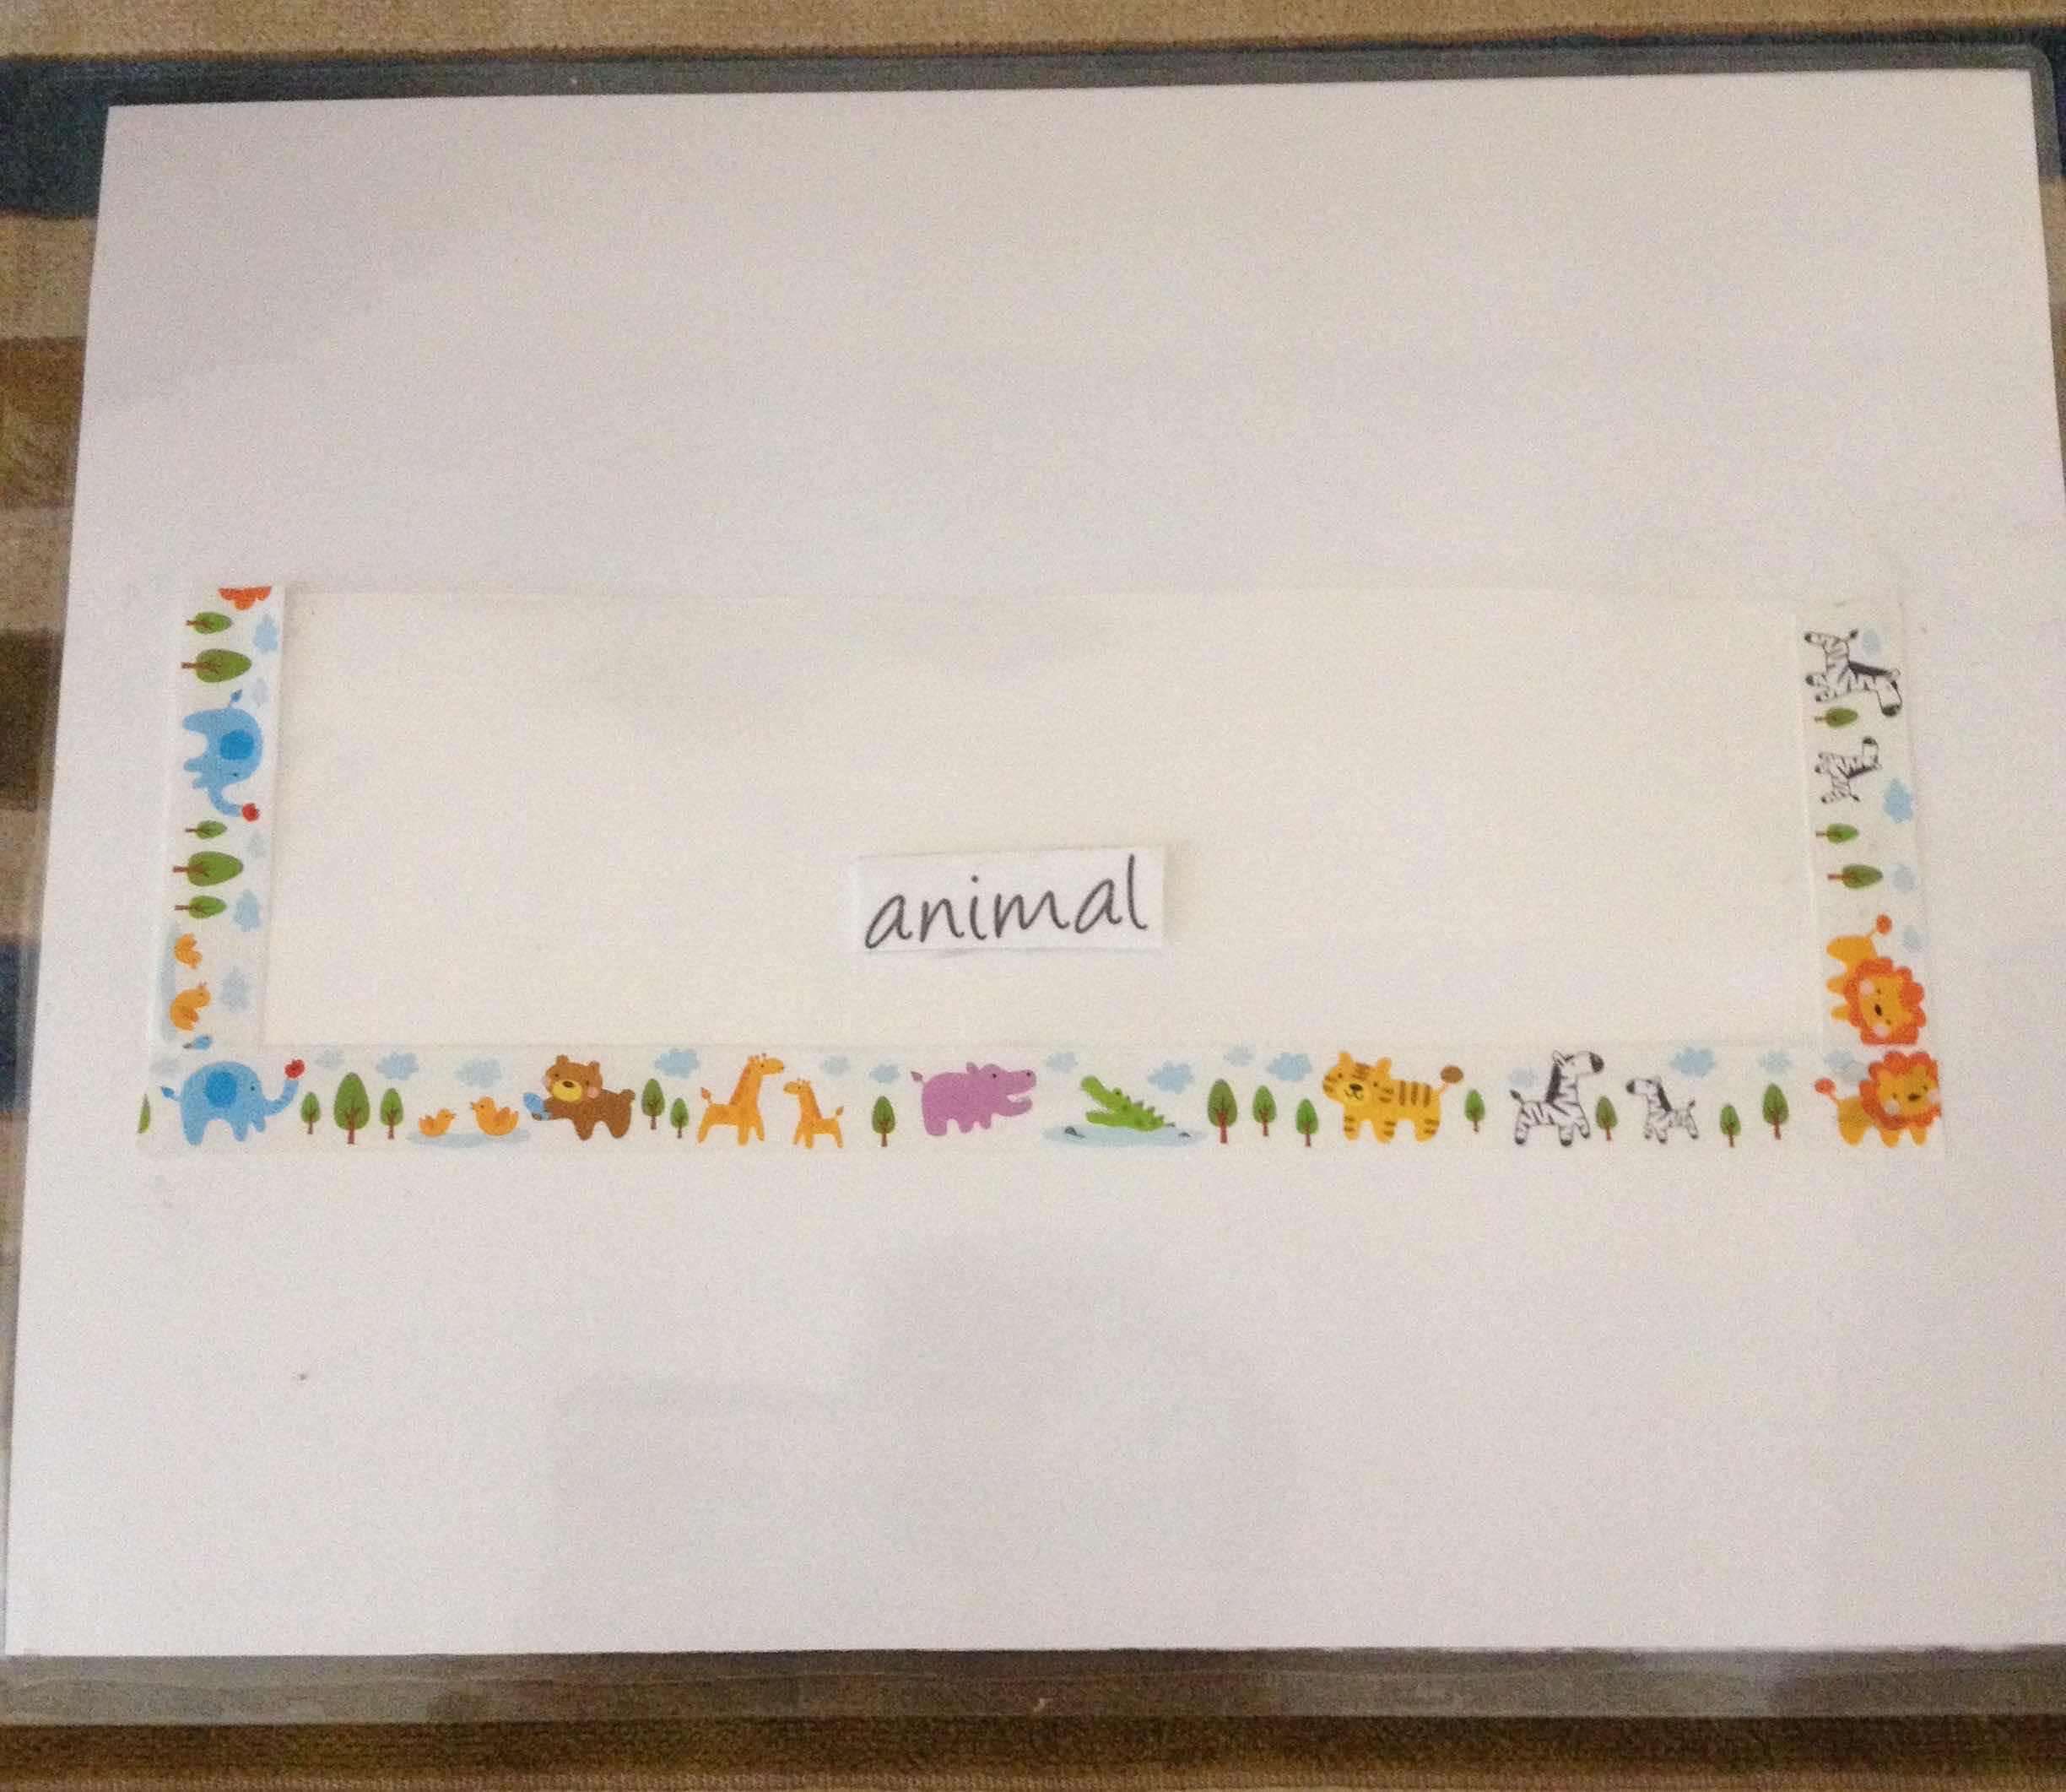
To create the pocket on the back I used the leftover piece from laminating the animals as it the images did not fit the entire laminating sheet. I adhered the extra bit of lamination on 3 sides leaving the top open with my Scotch Advanced Tape Glider. I also attached the word animal from the set in the same way in the middle of the pocket. To finish it off I used some fun jungle themed washi tape I had in my collection.
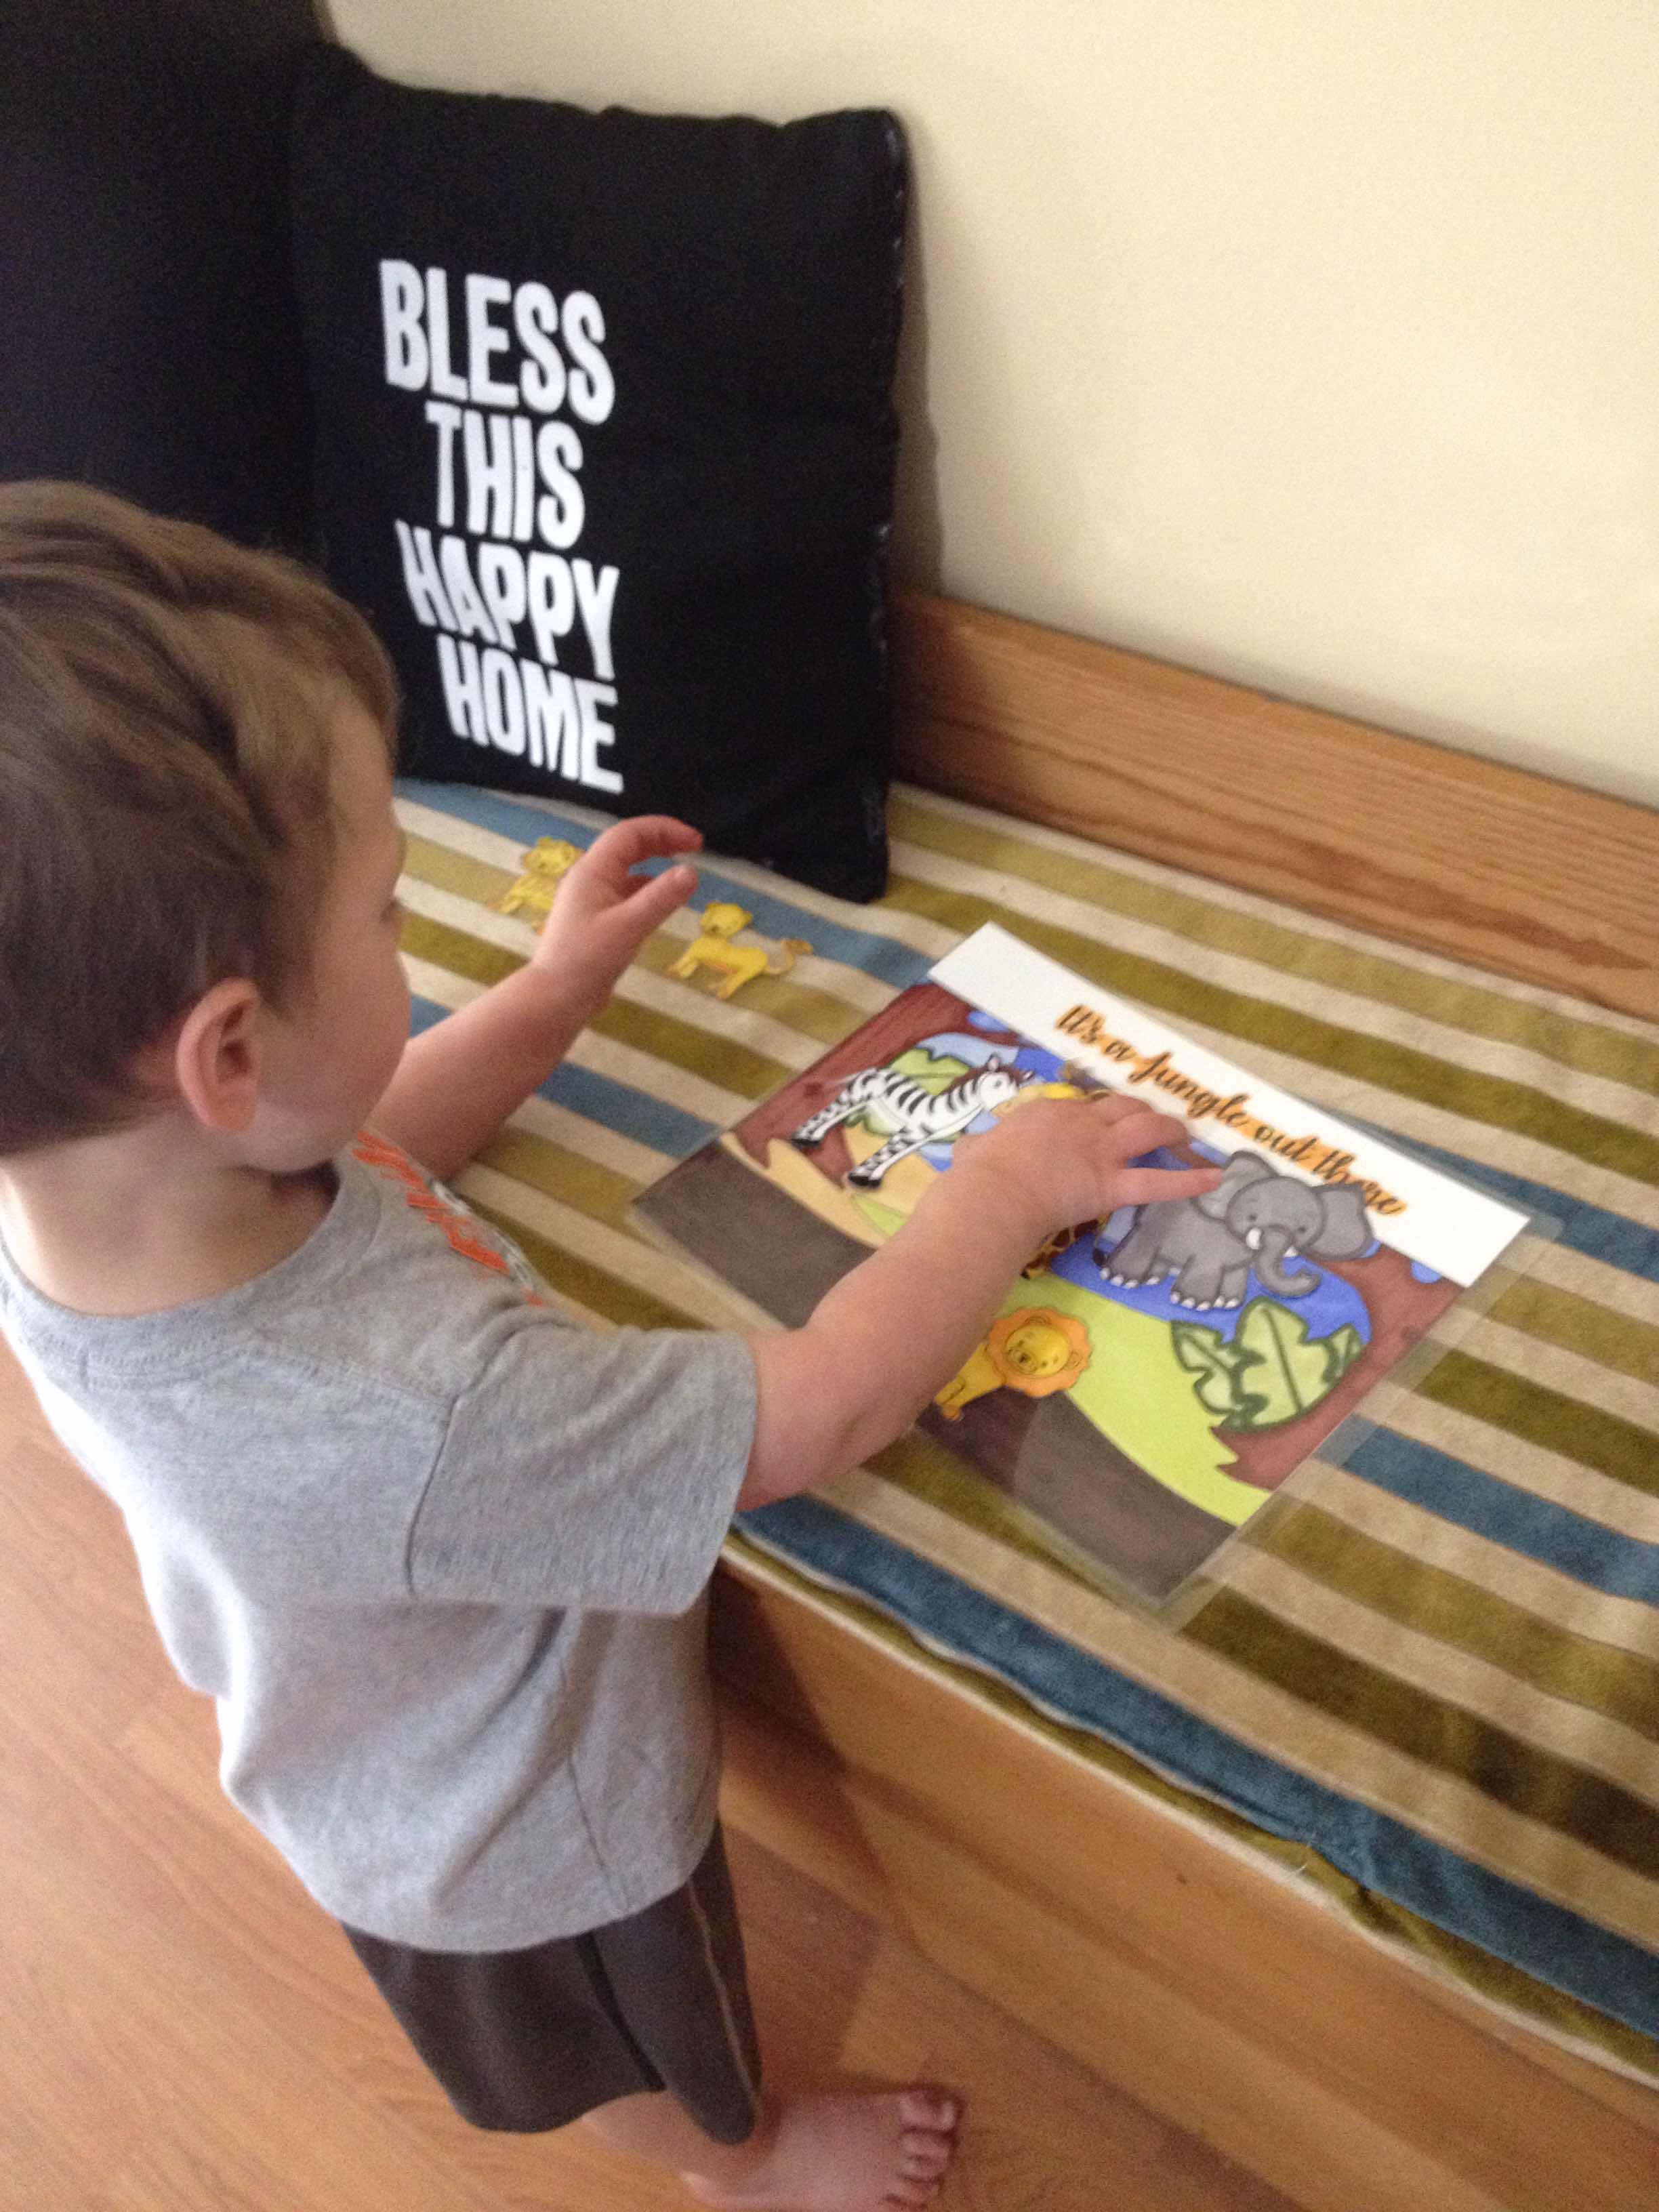
Pocket filled with the animals. They actually stay in there even if you shake it around and put it upside down. So it would be easy to take with you as a on the go activity for your little one.
This is what the pocket looks like empty.
The animals on the mat, it's so fun you can move them around and play.
A look at it all in one go of the process of play and how it all works
I hope this inspired you today and gave you a new way to use and play with digital stamps.
Affiliate Link Disclosure: I participate in various affiliate programs. That means I receive a small commission, at no additional cost to you, when my readers purchase products through links I provide here on my blog. By participating in affiliate programs I am able to generate income by sharing links to the products I love. I only share product info for things I love and use in my projects. If I don't love it I won't endorse it here. I'm a proud affiliate of Scrapbook.com, and Simon says stamp.


Comments